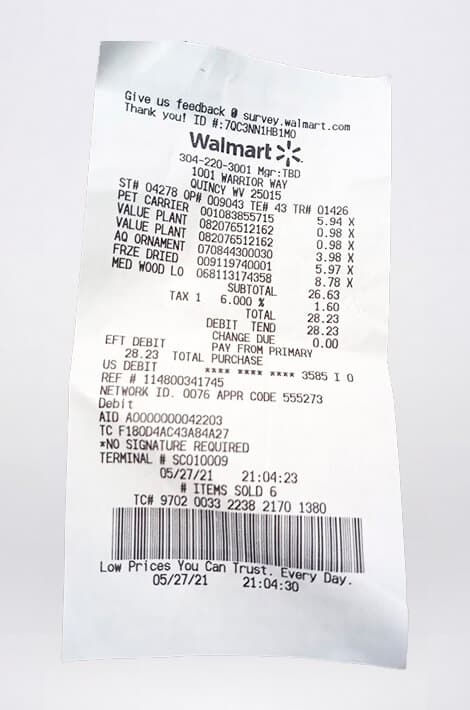
Tabscanner simplifies extracting data from receipts and invoices with its cutting-edge OCR technology. This blog
demonstrates how to integrate Tabscanner’s API into your Node.js backend to process receipts and retrieve structured
data in JSON format.
Leveraging short polling, Tabscanner efficiently handles the processing of receipt images, with results
typically available in about 5 seconds. Let’s explore how to implement this.
Why Use Tabscanner?
Tabscanner supports the following features:
- Uploads: Process images in JPG or PNG format, including smartphone photos or screenshots.
- Language Support: Handle multiple languages and character sets.
- Data Extraction: Retrieve totals, tax breakdowns, line items, merchant details, and more.
Prerequisites
- Tabscanner API Key: Obtain this from your Tabscanner account.
- Node.js Environment: Install Node.js and the Axios library (npm install axios).
- Backend Integration: Tabscanner is designed for server-side use, not direct integration
with mobile apps.
Step 1: Upload a Receipt for Processing
The first step is submitting a receipt image to the /process endpoint. This returns a token that you’ll use to
poll for results.
Code Example
    const axios = require('axios');
    const fs = require('fs');
    const FormData = require("form-data");

    // API Configuration
    const API_KEY = "your_api_key_here";
    const PROCESS_ENDPOINT = "https://api.tabscanner.com/api/2/process";

    async function uploadReceipt(filePath) {
        try {

            const form = new FormData();
            form.append("file", fs.createReadStream(filePath));

            const response = await axios.post(PROCESS_ENDPOINT, form, {
                headers: {
                    apikey: API_KEY,
                    'Content-Type': 'multipart/form-data'
                }
            });

            if (response.status === 200) {
                const token = response.data.token;
                console.log(`Token: ${token}`);
                return token;
            } else {
                console.error(`Error uploading receipt: ${response.status}`, response.data);
                return null;
            }
        } catch (error) {
            console.error("Error uploading receipt:", error.message);
            return null;
        }
    }
Step 2: Poll for Results Using the Token
Once you have the token, poll the /result endpoint to check if the receipt processing is complete. Polling every
second is recommended after an initial delay of about 5 seconds.
Code Example
    const RESULT_ENDPOINT_BASE = "https://api.tabscanner.com/api/result/";

    async function pollForResult(token) {
        const pollingUrl = `${RESULT_ENDPOINT_BASE}${token}`;

        while (true) {
            try {
                const response = await axios.get(pollingUrl, {
                    headers: {
                        apikey: API_KEY
                    }
                });

                if (response.status === 200) {
                    const resultData = response.data;
                    const status = resultData.status;

                    if (status === "done") {
                        console.log("Processing complete!");
                        return resultData.result;
                    } else if (status === "pending") {
                        console.log("Processing... retrying in 1 second.");
                        await new Promise((resolve) => setTimeout(resolve, 1000));
                    } else {
                        console.error(`Unexpected status: ${status}`);
                        return null;
                    }
                } else {
                    console.error(`Error polling for result: ${response.status}`, response.data);
                    return null;
                }
            } catch (error) {
                console.error("Error polling for result:", error.message);
                return null;
            }
        }
    }
Step 3: Combine Upload and Polling
Integrate the upload and polling functions into a complete workflow.
Code Example
    async function processReceipt(filePath) {
        console.log("Uploading receipt...");
        const token = await uploadReceipt(filePath);

        if (!token) {
            console.error("Failed to start receipt processing.");
            return;
        }

        console.log("Polling for results...");
        const result = await pollForResult(token);

        if (result) {
            console.log("Receipt Data Retrieved:");
            console.log(result);
        } else {
            console.error("Failed to retrieve receipt data.");
        }
    }
Step 4: Run the Script
Provide the path to your receipt image and process it.
    (async () => {
        const receiptFile = "path/to/your/receipt.jpg";
        await processReceipt(receiptFile);
    })();
Example Output
Once the receipt processing is complete, the API returns a JSON object with structured data like:
    {
        "establishment": "SuperMart",
        "date": "2025-01-01 14:32:00",
        "total": 45.67,
        "subTotal": 41.23,
        "tax": 4.44,
        "lineItems": [
            {"desc": "Apple", "qty": 3, "price": 1.5, "lineTotal": 4.5},
            {"desc": "Milk", "qty": 1, "price": 2.5, "lineTotal": 2.5}
        ]
    }
Error Handling
The API provides detailed error codes. Here are some common ones:
- 400: API key not found.
- 403: No file detected.
- 405: Unsupported file type.
- 500: OCR Failure.
Use the response’s message and status attributes for debugging.
Tips for Improving Results
- Image Quality: Ensure the receipt is well-lit and in focus.
- Format Guidance: Use images with dimensions greater than 720×1280 for best results.
- Custom Configurations: Contact Tabscanner for advanced features like custom fields or
line-item resolution.
Conclusion
Tabscanner’s receipt OCR API is a powerful tool for extracting data from receipts with minimal setup. By following
this guide, you can integrate it into your Node.js backend and streamline your data processing workflows.
For more details, visit the Tabscanner Documentation. 🚀
Happy coding!


![Receipt OCR using node.js and Javascript [Guide 2025]](https://tabscanner.com/wp-content/uploads/2025/01/nodejs.jpg)